Use Google Login (OAuth) with FastAPI - Python (Part 1)
We are going to allow the user to login using its Google Credentials via OAuth in our FastAPI project.

Requirements
This guide assumes you already have installed in your system python3.8 (or newer).
Setting up the environment:
We need to install FastAPI, so we are going to create a virtual environment, activate it and use pip to install the lib.
We are going to use Uvicorn to run the FastAPI app.
mkdir fastapi-googlelogin
cd fastapi-googlelogin
python3.8 -m venv .venv
source .venv/bin/activate
pip install fastapi
pip install uvicorn
Development
After we have all the libs installed in our virtualenv, we can start to code.
Create a basic App:
The first step is to create a simple FastAPI app with a public endpoint. Let’s create a run.py file in the root folder:
File: fastapi-googlelogin/run.py
import uvicorn
from fastapi import FastAPI
app = FastAPI()

@app.get('/')
def public():
    return {'result': 'This is a public endpoint.'}


if __name__ == '__main__':
    uvicorn.run(app, port=7000)
We can run the app with python ./run.py (Make sure you have the virtualenv activated).
We can check if everything is working entering http://127.0.0.1:7000/ in any explorer, or just using the terminal:
$ curl 127.0.0.1:7000
{"result":"This is a public endpoint."}
Create Google Credentials:
To set up the credentials we are going to need a Google account.
Access to the Google Cloud Console with your Google account: GoogleCloud
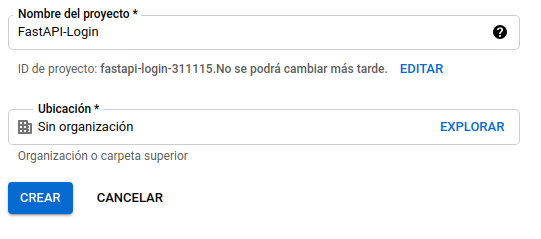
- Create a new project:
- Get your credentials:
- Select your newly created project in the google console webpage.
- Go to Credentials on the side panel.
- Go to Create Credentials -> OAuth client ID.
- We need to set up the consent screen, so we are going to set the
User typetoExternal.- First screen (App info):
- Set up the App Name, Support Email. The Logo is optional.
-
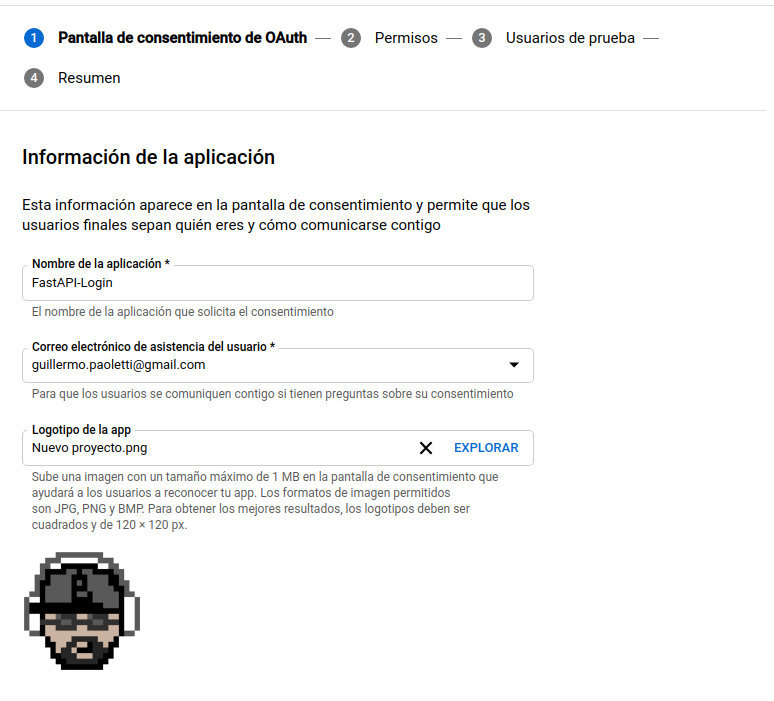
- Set up developer email
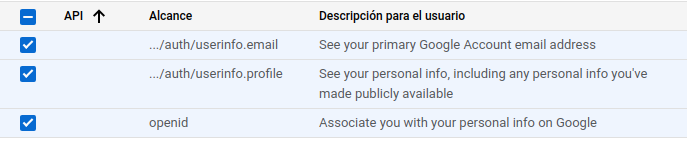
- Second screen (Scopes):
- Add
userinfo.email,userinfo.profile,openid-> Save and continue. -
- Add
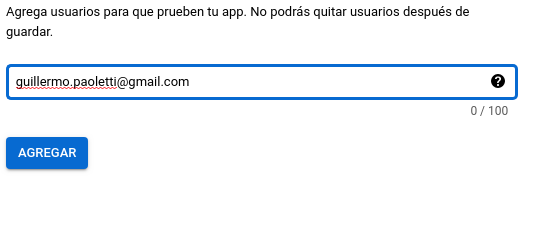
- Third screen (Test users):
- Add your email as a test user to start testing the application.
-
- First screen (App info):
- After the consent screen is ready we can finally create the OAuth client id. So we go to Credentials -> Create Credentials -> OAuth client ID.
- Set up the OAuth client ID:
- Application Type: Web Application.
- Name: FastAPI-Login (or any other name).
- Authorized JavaScript origins:
http://127.0.0.1:7000. - Authorized redirect URIs:
http://127.0.0.1:7000/auth. We are going to create this endpoint in the next step. - (These urls should be modified to allow requests from your domain when the app is hosted in a server.)
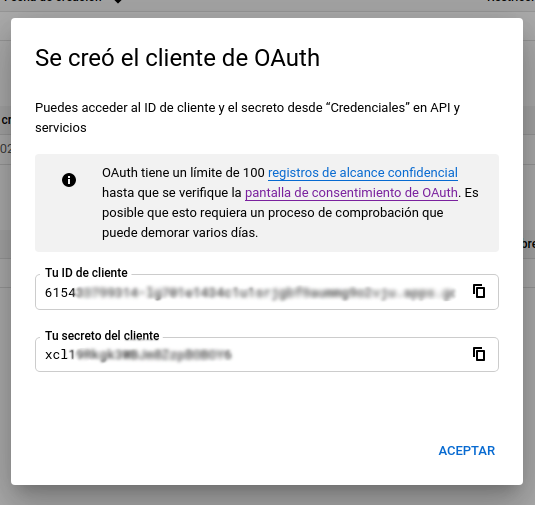
- After creating the client, it will pop a modal with your
client IDandclient secret -
Set up OAuth in the project:
We are going to use libs already created for Starlette because FastAPI is build on top of that.
We need to install authlib in our virtualenv and we are going to use this lib to handle the Google Login.
We need to install itsdangerous, because in the next step we are going to use Starlette middleware sessions that requires it.
Install the dependency:
# Make sure the virtualenv is activated
# source .venv/bin/activate
pip install authlib
pip install itsdangerous
Create the OAuth client:
We need the client_id and the client_secret. To avoid pushing our credentials to the server we are going to pass the values using the environment variables GOOGLE_CLIENT_ID and GOOGLE_CLIENT_SECRET.
To avoid running the code without this variables, we just ask if they are set and if they aren’t we just stop the process.
After getting the credentials in the code, we are going to register the OAuth client, we are going to just ask google for openid email profile.
This code is added to the file: fastapi-googlelogin/run.py, after the app=FastAPI() line.
import os
from starlette.config import Config
from authlib.integrations.starlette_client import OAuth

# OAuth settings
GOOGLE_CLIENT_ID = os.environ.get('GOOGLE_CLIENT_ID') or None
GOOGLE_CLIENT_SECRET = os.environ.get('GOOGLE_CLIENT_SECRET') or None
if GOOGLE_CLIENT_ID is None or GOOGLE_CLIENT_SECRET is None:
    raise BaseException('Missing env variables')

# Set up oauth
config_data = {'GOOGLE_CLIENT_ID': GOOGLE_CLIENT_ID, 'GOOGLE_CLIENT_SECRET': GOOGLE_CLIENT_SECRET}
starlette_config = Config(environ=config_data)
oauth = OAuth(starlette_config)
oauth.register(
    name='google',
    server_metadata_url='https://accounts.google.com/.well-known/openid-configuration',
    client_kwargs={'scope': 'openid email profile'},
)
Optional create a file to run the app:
- Create a script to call the
run.pyfile using setting theenv vars. Make sure you add this file to.gitignoreto avoid pushing your credentials to your repository. Instructions assuming you are inside the project folder:- Create the file:
run.sh:source .venv/bin/activate export GOOGLE_CLIENT_ID=615... export GOOGLE_CLIENT_SECRET=xcl... python3 run.py - Make the code executable:
chmod +x run.sh - Run the app:
./run.sh - If you are running
Windows, you can set the env vars usingsetinstead ofexport.
- Create the file:
Create login route
Add a middleware to get the session information:
We are going to add a session middleware in the FastAPI app, so AuthLib can get and use the request session.
In the file: run.py we are going to add:
from starlette.middleware.sessions import SessionMiddleware
SECRET_KEY = os.environ.get('SECRET_KEY') or None
if SECRET_KEY is None:
    raise 'Missing SECRET_KEY'
app.add_middleware(SessionMiddleware, secret_key=SECRET_KEY)
Like the google credentials we use environments variables to avoid uploading our key to the repository.
OPTIONAL: Create a secret string using python:
In a terminal you can run python3.6+ and use the secrets lib to generate a safe string for your middleware
$ python3
import secrets
generated_key = secrets.token_urlsafe(30)
print(generated_key)
It will output something like OulLJiqkldb436-X6M11hKvr7wvLyG8TPi5PkLf4, we can add it to the run.sh file so it set the secret key on the same script.
export SECRET_KEY=OulLJiqkldb436-X6M11hKvr7wvLyG8TPi5PkLf4
Create the endpoints:
Now we need to create a login route so the user can enter its data. After login in with its google credential, we are going to redirect to auth, so we can handle the tokens.
Let’s create the routes on the run.py file:
from fastapi import Request
from starlette.responses import RedirectResponse
from authlib.integrations.starlette_client import OAuthError

@app.route('/login')
async def login(request: Request):
    redirect_uri = request.url_for('auth')  # This creates the url for the /auth endpoint
    return await oauth.google.authorize_redirect(request, redirect_uri)


@app.route('/auth')
async def auth(request: Request):
    try:
        access_token = await oauth.google.authorize_access_token(request)
    except OAuthError:
        return RedirectResponse(url='/')
    user_data = await oauth.google.parse_id_token(request, access_token)
    request.session['user'] = dict(user_data)
    return RedirectResponse(url='/')
Let’s update our endpoint to check if the user is logged in or not and make a simple logout endpoint:
from starlette.responses import HTMLResponse
@app.get('/')
def public(request: Request):
    user = request.session.get('user')
    if user:
        name = user.get('name')
        return HTMLResponse(f'<p>Hello {name}!</p><a href=/logout>Logout</a>')
    return HTMLResponse('<a href=/login>Login</a>')


@app.route('/logout')
async def logout(request: Request):
    request.session.pop('user', None)
    return RedirectResponse(url='/')
Link to the code
This app is uploaded to github, you can view the repository using this link, this tutorial is the branch guide-1
Related Guides
The part 2 of this tutorial explains how to create sub-applications with FastAPI. It explains how to configure different middlewares and how to create and use JWT Bearer token authentication for each protected endpoints.
The part 3 of this tutorial modifies the Tokens to improve its functionality and usability.